‘

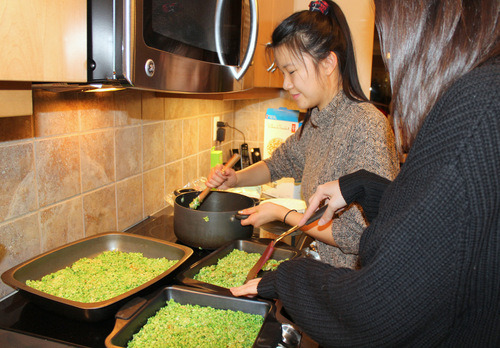
This Make It Yourself Monday was one of the hardest ones I’ve ever done. My friends and I have decidedto make it a tradition that we bake something every holiday. If you missed our adorable Halloween baking adventures, check it out hereand here.
We wanted to make something easy this Christmas. We needed a treat to bring to our friend’s potluck so we thought making Rice Krispies Christmas Trees would be the perfect thing. However, this definitely looks a lot easier than it is. We ran into a lot of problems while trying to accomplish this recipe and there was a lot of stress involved in this process. But, I think everything turned out well in the end and I think these trees are absolutely adorable. Just learn from our mistakes when trying this for yourself!
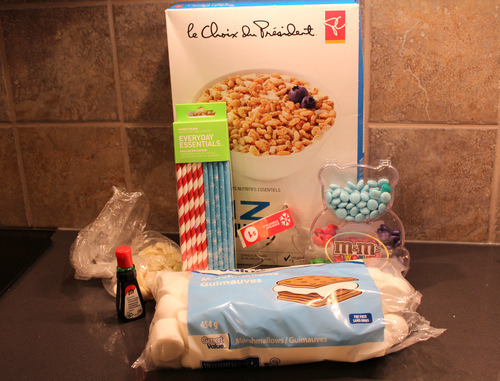
Ingredients:
- 3 tablespoons butter or margarine
- 4 cups miniature marshmallows
- Green gel food coloring
- 6 cups Rice Krispies
- Christmas tree cookie cutter
- Lollipop sticks (we used straws… don\’trecommend, so we decided to skip this step. Ideally you are supposed to stick the sticks into the bottoms of the trees to make them lollipops.)
- White chocolate chips (we used white candy melts)
- Christmas M&M’s

Directions:
- Place the butter and marshmallows into a large saucepan and place over medium/low heat
- Stir constantly until the butter and marshmallows are melted and smooth
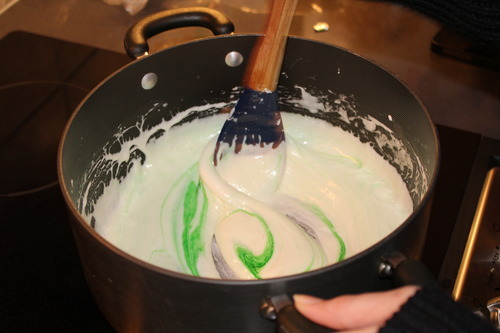
- Add in green food colouring
- Keep stirring constantly until green colour is evenly dispersed
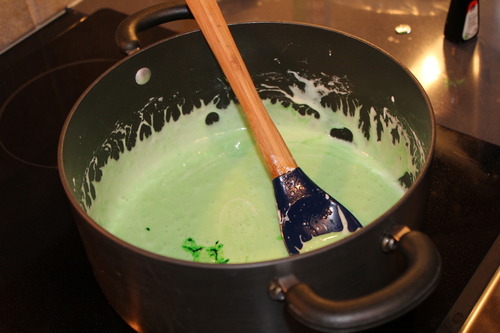
- We found that it took a very large amount of food colouring to reach the shade of green we wanted. Keep in mind that once you add in the cereal, the colour will get even lighter.
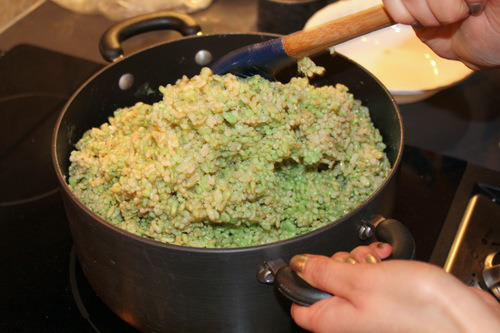
- Pour in the Rice Krispies
- Keep folding them into the marshmallow mixture until every Rice Krispies is covered.
- Don’t allow the Rice Krispies to stick to the bottom of the pan because they will burn and turn brown.
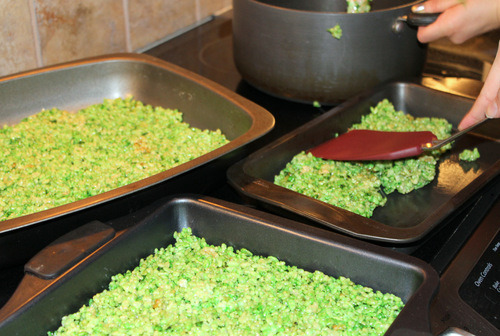
- Spoon the mixture into greased pans and flatten with a spatula
- Each layer should be ¾” thick
- Allow the pans to cool for 15-20 minutes
- We sped up the process by sticking them in the fridge for 10 minutes
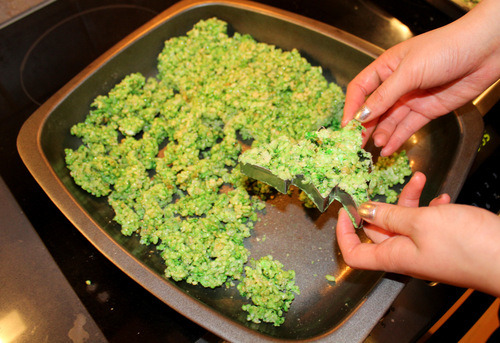
- Cut out Christmas Tree shapes with a cookie cutter (we found ours at Superstore for a dollar)
- This was the toughest part of the recipe. The Rice Krispies mixture was incredibly hard and cookie cutter was not able to cute through the layer. We found that by placing the pans in a microwave, (metal shouldn’t go in the microwave by the way, oops) we were able to soften the mixture so we could successfully cut out the tree shapes.
- Place the Christmas Trees on a piece of wax paper
- Allow them to cool fully

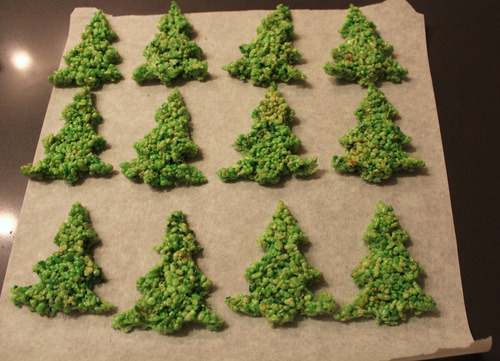
- Melt ½ cup of White Candy Melts or white chocolate chips in the microwave for 30 second intervals, stirring occasionally until they are melted
- Place melted mixture into a Ziploc baggie (or a piping bag if you’re fancy) and snip off the corner
- Squeeze the bag and drizzle the melted chocolate over the trees
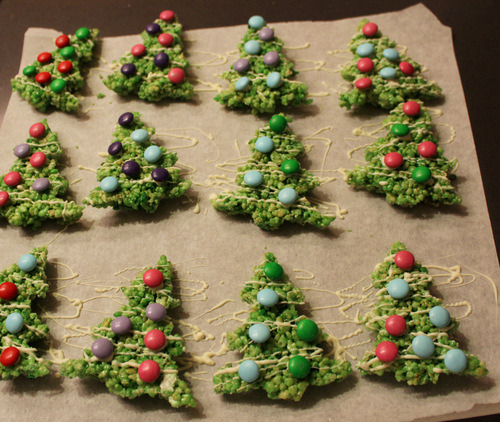
- Lastly adhere coloured M&M’s to the trees with more White Candy Melts or melted white chocolate.
And there we are! You are left with the cutest Christmas Trees. We decided to double the recipe and ended up with approximately 48 trees. The ingredients listed above will produce you 24 trees. A word of advice: if you decide to double the recipe, do it in two batches. We were overachievers and thought our pot would be big enough. It wasn’t.
Although our cute Rice Krispies Christmas Trees looked adorable and tasted mediocre, they were incredibly hard. I’m pretty sure they almost cracked everyone’s teeth. I’m still not entirely sure what we did wrong.
Are you going to try out thisMake It Yourself Monday? Tweet me (@bettathanhannah) or Instagram me (@taylorlainee) pics if you do! I would love to see how yours turns out.
And Merry Christmas!